


This guide explains how to set up e-banking for payments so that Sage produces a file to upload supplier payments to your bank.
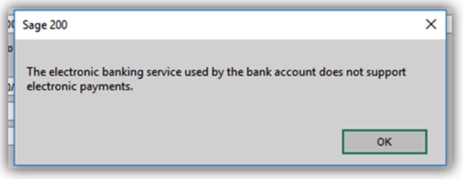
To do this the plug-in for the relevant bank account needs to be installed for every user who will be making Sage payments. Any user who tries to make a payment from a payment group marked as ‘electronic payment’ (in PL settings > payment groups tab) but doesn’t have the relevant plug-in will receive an error like the one below.
You will require administration permissions to install the plug-in.
If you already have e-banking set up for some users you will only need to follow the plug-in installation headings in the below guide:
1. Install the Sage e-banking component
2. Install the e-banking component for your specific bank
3. Configure your e-banking service
Install the Sage e-Banking component
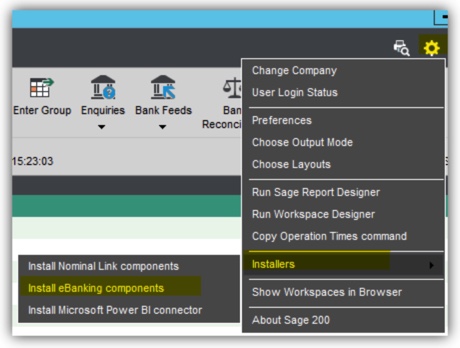
To install the component from the Sage 200 desktop:
Select Tools > Installers > Install eBanking components
Click Install
You will be asked to run the installer. During this process you may be asked for admin credentials. If you don’t have these then contact your IT provider. HINT: you may need these more than once.
Install the e-Banking service for your specific bank.
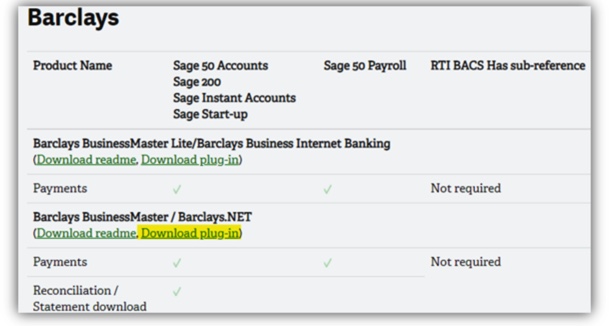
Visit this page to check which banks are compatible with e-Banking: https://my.sage.co.uk/public/sage-ebanking/compatible-banks.aspx
if your bank does not say ‘Payments’ underneath then it is not compatible with this functionality.
You’ll need to close and re-open the Sage 200 desktop app to see your e-Banking Service in the list.
HINT: When you encounter an installation wizard during any of the above processes then simply click NEXT throughout until complete.
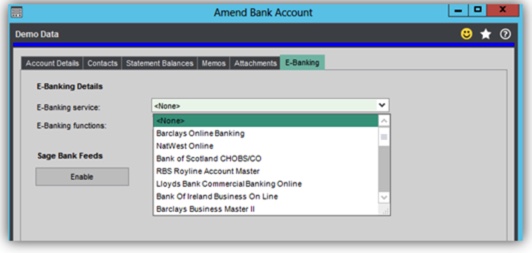
To check that the components have been installed successfully go to your ‘Bank Account List’ and click to amend one of your accounts, navigate to the E-Banking tab and check that a list is visible next to ‘E-Banking service’. If your account is still not listed in the dropdown then this is usually because you have insufficient privileges to install the plug-in, in which case please refer to your IT provider to check.
Once the components are installed successfully you need to configure your cash book account.
Navigate to the Cash Book > Bank Account list. Highlight the bank account from which these payments are to be made and click ‘amend account.’
Go to the E-Banking tab, next to ‘E-Banking Service’ select your account name.
Next to ‘E-Banking Functions’ select ‘Payments Only’ (or payments and reconciliation – this is covered in another guide). Note: Not all banks support all functions. If you can’t see a function in the list, it’s not supported by your bank.
Then click ‘File Locations’ .
When you run generate payments to E-banking accounts Sage outputs a file which you then use to upload your payments to your bank account. Within ‘File Locations’ you can set the location that Sage will automatically save this by default, click ‘Browse’ next to the ‘Directory’ and navigate to a suitable file location.
Output payment files are named according to the date they are produced. You can add a prefix to the file name by entering a File identifier field. You can also leave this blank if you wish.
Your bank may require the upload file to be a specific file type, either a TXT or CSV file. You should identify this against the ‘File extension’ by entering either TXT or CSV in this box.
Click ‘OK’ and then ‘Save’ your bank account.
If you want to pay your suppliers via e -banking, each supplier account must belong to a payment group that uses an Electronic payment method and you must use the Generate payments feature to pay your suppliers.
The first step is to set up or reconfigure a payment group. Go to
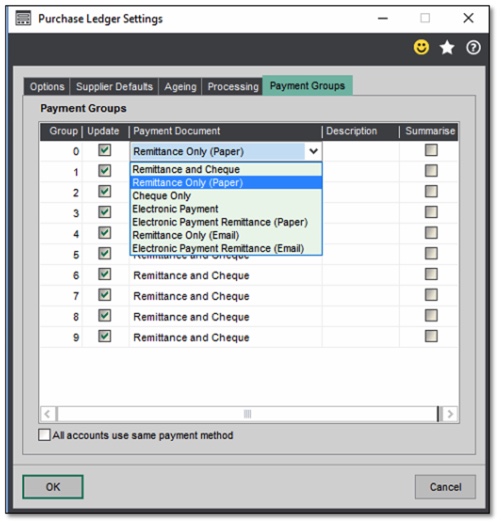
Purchase ledger > utilities > ledger set up > ledger settings > payment groups tab
Note: As this is a setting you will only be able to change it if other users are not actively working in that Sage company.
You might have an existing payment group already set up which you can simply change to the ‘Electronic payment’ type. For example in the below payment group currently set to ‘Remittance only (Paper)’ you could change that to ‘Electronic Payment Remittance (Paper)’. The description column is simply your own name for that payment group to assist you in identifying them if you have multiple groups with the same type.
You can create a single payment group for all suppliers that you pay via e-banking or you can use separate groups. You might want separate groups if you do your payment runs at different times, or want to use a mixture of printed or emailed remittances.
HINT: be careful when selecting payment types with (Email) in them as the supplier account must have an email address set up for the remittances to send automatically
HINT: If you are setting up a new payment group you probably want to tick the ‘Update’ box. Click the question mark in the top right of the open window when you have it open in Sage 200 to be directed to the helpfiles on payment groups if you would like more information
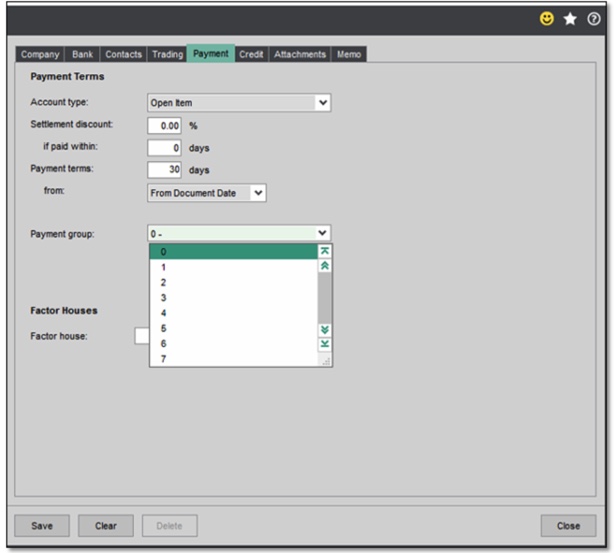
To change the payment group of a supplier open:
Suppliers List > Amend Account > Payment Tab
There is a dropdown for you to select your required payment group from.
You are now ready to make payments which generate an e-banking file to upload to your bank account.
The first time you do this it is wise to select a single supplier payment for testing before actioning a bulk payment run.
At EBS, we’re here to support you every step of the way, and our friendly team are here waiting to help and assist you.
We’d love to hear from you, so please email us at info@ebs.tech, give us a call on 0121 384 2513, or click the ‘Contact Us’ button below and a member of our team will get back to you as soon as possible.
| Cookie | Duration | Description |
|---|---|---|
| _GRECAPTCHA | 5 months 27 days | This cookie is set by the Google recaptcha service to identify bots to protect the website against malicious spam attacks. |
| cookielawinfo-checkbox-advertisement | 1 year | Set by the GDPR Cookie Consent plugin, this cookie is used to record the user consent for the cookies in the "Advertisement" category . |
| cookielawinfo-checkbox-analytics | 1 year | Set by the GDPR Cookie Consent plugin, this cookie is used to record the user consent for the cookies in the "Analytics" category . |
| cookielawinfo-checkbox-functional | 1 year | The cookie is set by the GDPR Cookie Consent plugin to record the user consent for the cookies in the category "Functional". |
| cookielawinfo-checkbox-necessary | 1 year | Set by the GDPR Cookie Consent plugin, this cookie is used to record the user consent for the cookies in the "Necessary" category . |
| cookielawinfo-checkbox-others | 1 year | Set by the GDPR Cookie Consent plugin, this cookie is used to store the user consent for cookies in the category "Others". |
| cookielawinfo-checkbox-performance | 1 year | Set by the GDPR Cookie Consent plugin, this cookie is used to store the user consent for cookies in the category "Performance". |
| CookieLawInfoConsent | 1 year | Records the default button state of the corresponding category & the status of CCPA. It works only in coordination with the primary cookie. |
| elementor | never | This cookie is used by the website's WordPress theme. It allows the website owner to implement or change the website's content in real-time. |
| Cookie | Duration | Description |
|---|---|---|
| __lc_cid | 2 years | This is an essential cookie for the website live chat box to function properly. |
| __lc_cst | 2 years | This cookie is used for the website live chat box to function properly. |
| __oauth_redirect_detector | past | This cookie is used to recognize the visitors using live chat at different times inorder to optimize the chat-box functionality. |
| Cookie | Duration | Description |
|---|---|---|
| _ga | 2 years | The _ga cookie, installed by Google Analytics, calculates visitor, session and campaign data and also keeps track of site usage for the site's analytics report. The cookie stores information anonymously and assigns a randomly generated number to recognize unique visitors. |
| _gat_gtag_UA_29752123_1 | 1 minute | Set by Google to distinguish users. |
| _gid | 1 day | Installed by Google Analytics, _gid cookie stores information on how visitors use a website, while also creating an analytics report of the website's performance. Some of the data that are collected include the number of visitors, their source, and the pages they visit anonymously. |
| CONSENT | 2 years | YouTube sets this cookie via embedded youtube-videos and registers anonymous statistical data. |
| Cookie | Duration | Description |
|---|---|---|
| VISITOR_INFO1_LIVE | 5 months 27 days | A cookie set by YouTube to measure bandwidth that determines whether the user gets the new or old player interface. |
| YSC | session | YSC cookie is set by Youtube and is used to track the views of embedded videos on Youtube pages. |
| yt-remote-connected-devices | never | YouTube sets this cookie to store the video preferences of the user using embedded YouTube video. |
| yt-remote-device-id | never | YouTube sets this cookie to store the video preferences of the user using embedded YouTube video. |
| yt.innertube::nextId | never | This cookie, set by YouTube, registers a unique ID to store data on what videos from YouTube the user has seen. |
| yt.innertube::requests | never | This cookie, set by YouTube, registers a unique ID to store data on what videos from YouTube the user has seen. |